There is no one best weapon, although some are only useful in specific circumstances.
Pulse Cannon
The default weapon. Fires medium speed/damage projectiles at a medium rate.
|
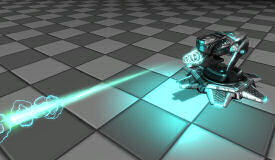
Pulse-to-Link Converter
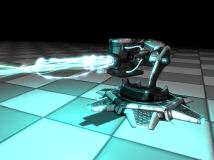
Requires that the Pulse Cannon be installed already. Modifies the Pulse Cannon to fire a beam, like the secondary fire of the Link Gun. The Sentinel will automatically use it to heal nearby occupied vehicles. The Sentinel can even heal a vehicle that it is deployed on top of, but it may have difficulty rotating to hit it, so experimentation is needed to find the best deployment position. If the Objective ID upgrade is installed, then the Sentinel will also use the beam to heal power nodes.
Note that the beam cannot be used to attack enemies, so a Sentinel equipped with this weapon makes an easy target.
|
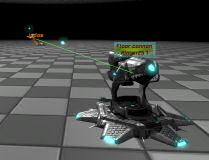
Rocket Launcher
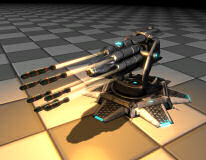
Fires multiple small rockets. The rockets don't do much damage individually, but they can cover a wide area, making them difficult to dodge. The rockets can home in on large targets, such as vehicles, making them almost impossible to dodge and dealing large amounts of damage in total. An excellent weapon against both vehicles and groups of enemies.
|
Minigun
Rapid-fire instant-hit weapon. Damage is not particularly high, and accuracy is poor at long range, but the near perfect aim of a Sentinel makes it guaranteed to hit at close to medium range. Good against airborne or very fast targets who might otherwise find it easy to dodge the projectile weapons.
|
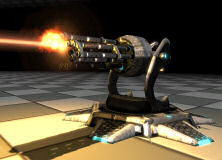
Flamethrower
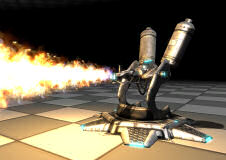
Best used at close range, the flamethrower continuously spews forth burning gas, causing large amounts of damage and potentially igniting targets, causing further damage for a while, even if they move out of the direct flame. The flames will bounce around corners to some extent.
|
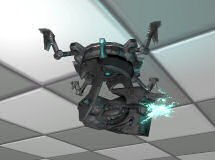
MOG
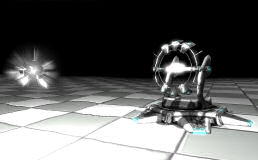
Fires a slow moving projectile that does almost no damage, but has huge force, sending players flying if they get too close, and pushing vehicles away. Even the largest vehicles are strongly affected, disrupting the driver's aim, and sometimes even flipping them over completely. Players on foot that are knocked over will drop flags/orbs. This weapon is a good choice for defence in many situations, and works particularly well when grouped with other Sentinels, as it will help keep enemies from getting up close where the Sentinels tend to be least effective, and often leaving the enemy immobile for a while, allowing the other Sentinels to get some free hits in.
|
Disturber
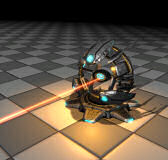
Fires a slow moving projectile that does a medium amount of splash damage for a direct hit. The Disturber's strength lies not in the damage of the projectile itself, but in its ability to use the projectile to "zap" with an instant-hit beam anyone straying close to the projectile. The beam never misses and deals a fairly large amount of damage. The Disturber's weak point is that it can't start zapping until the projectile has moved sufficiently far away, making it best for long range attacks. Also, since it can't zap once the projectile has hit something, it is actually less effective against stationary targets, since the projectile will hit the target, allowing less time for the Disturber to use it for zapping.
|
Multi-Mortar
Artillery. The configuration menu for this weapon allows you to select from a number of different shell types. The default High Explosive shell is moderately effective in most situations, or you can choose one of the more specialized shell types that are very effective in some situations, at the cost of being ineffective in others. The configuration menu also allows adjustments to elevation (the angle at which shells are launched). A high elevation is good for firing over high obstacles like walls. A low elevation reduces the travel time of the shell, making it more likely to hit moving targets. Maximum range is achieved at exactly 45°.
The mortar's biggest strength lies in its indirect fire ability. If the Sentinel is equipped with a Mesh Network upgrade, then it can fire on enemies that other Mesh Network-equipped Sentinels are targeting, even if it cannot see them itself. Ideally you would have a battery of mortars hidden behind cover, and one "spotter" Sentinel in a position to view the enemy (the Surveillance Module is perfect for this). That way, the mortars can bombard the enemy while being protected from return fire.
The high arcing trajectory means that the mortar cannot attack very close targets, and it cannot be used indoors, or anywhere there is not a clear space above the mortar.
|
Pulse Cannon
Similar to the Floor Cannon's version of this weapon, except the projectiles are smaller and faster and fired at a higher rate. The overall damage is low, but it is hard to dodge.
|
Pulse-to-Link Converter
Again, very much like the Floor Cannon's weapon of the same name. This one is less efficient at healing, but has longer range.
|
Grenade Launcher
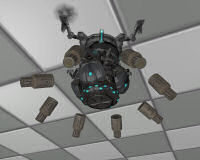
Fires multiple bouncing grenades in all directions. Each grenade does a lot of damage, so the total damage output of this weapon is huge. The range is quite small and the grenades easily dodged individually, so this is best employed in an enclosed space where enemies are forced to pass close to the Sentinel.
|
Surveillance Module
Requires the Mesh Network Interface upgrade to be installed first. Not really a weapon at all, the Surveillance module merely observes targets and notifies other Sentinels of them. Since it is completely passive, it is less likely to draw enemy fire and thus can be placed in a more exposed position with a good field of view. It is much more effective at this if the Cloaking Device upgrade is also installed, otherwise it is a sitting duck once seen. It also benefits from the Organic Motors upgrade, which make it less likely to be heard when rotating.
Additionally, if the Sentinel is equipped with the Telemeter upgrade, then the Surveillance Module can transmit live video to Sentinel Deployers. This is useful so that you can observe an area without having to be present. If there are multiple Surveillance Modules transmitting video, then you will see the signal from the one that is closest to your crosshair.
|
Note that some upgrades only show up in the list of available upgrades in the upgrade menu if it is currently possible to install them. They will not show up if you have not yet installed any upgrades they require, or if you have installed any upgrades that they are incompatible with.
Armour Plating
Absorbs a fraction of damage the Sentinel takes. It eventually wears out, so check back every so often to see if you need to install a new one. You can see the condition of the armour in the upgrade menu.
|
Organic Motors
Increases the Sentinel's rotation speed. This makes it harder for enemies to stay out of the Sentinel's field of fire. Particularly useful for the Floor Cannon, which is otherwise quite slow.
|
Enhanced Sensors
Allows the Sentinel to detect enemies more easily and at slightly greater range, by both sight and sound. A Ceiling Sentinel with this upgrade is almost impossible to sneak up on.
|
Infra-Red Sensors
Requires Enhanced Sensors to be installed first. Allows the Sentinel to see invisible targets (players with the invisibility power-up and Nightshades).
|
Mesh Network Interface
Allows the Sentinel to send/recieve notifications to/from other Sentinels when a target is spotted. The best use for this is to apply the upgrade to a group of Sentinels where one is in a good position to spot enemies, and it will then notify the other Sentinels so they can all start firing as soon as the target comes into view instead of having to wait until all the Sentinels detect the target individually. It also makes it more likely that a group of Sentinels will all concentrate their fire on a single target, making them more deadly.
You can see in the upgrade menu how many other Sentinels are connected, although they will not be counted until the Sentinel first transmits something over the network.
|
Telemeter
Transmits information to Sentinel Deployers held by allies. With this installed, while you are wielding your Sentinel Deployer you will be able to see the Sentinel's health displayed in a box above it, along with its owner's name. If the Sentinel is targeting something, then the location and name of the target will also be displayed on your HUD. This is useful so that you can see which Sentinels need repairs, and also get some idea of where enemies are even if you cannot see them personally.
|
Molecular Shield
Encloses the Sentinel in a sphere that completely blocks incoming damage. The shield blocks all weapons fire except that from the owning Sentinel, not just enemy fire, although it only takes damage from enemy fire. The shield will eventually wear out and need replacing. You can see the condition of the shield in the upgrade menu.
Note that once installed, you cannot upgrade the Sentinel from outside the shield. This may render it impossible to upgrade a Sentinel in a hard-to-reach location, so think carefully before you install it. Also note that it is impossible to install both a shield and a cloak at the same time.
|
Self Destruct

Greatly increases the size of the explosion when a Sentinel is destroyed. The Redeemer-sized explosion is a great way to get instant revenge on whoever destroyed your precious Sentinel. It also provides some defence against sabotage, since if the sabotage attempt destroys the upgrade, it explodes, destroying both the Sentinel and the saboteur. It does have risks though, as it will kill you too if you are too close, and you can't remove it once installed, so if you try to "recycle" your Sentinel for any reason, you will be blown to smithereens.
|
CPU
Has a small effect on the ability of the Sentinel to predict enemy movements, improving accuracy with projectile weapons. This upgrade is not especially useful by itself, and it has no effect if an instant-hit weapon is installed, but it is required in order to install a number of other more useful upgrades.
|
Objective ID
Requires CPU to be installed first. Allows the Sentinel to attack objectives, such as power nodes. It also makes the Sentinel prefer to target enemies with carried objects such as flags and orbs. It is of no use in gametypes that have no objectives.
|
Cloaking Device

Renders the Sentinel almost invisible until it fires. Especially useful if a Sentinel is placed where it is likely to be shot at before it has a chance to acquire the target, thus making it less likely to be damaged before it can attack.
You might want to consider installing the Telemeter upgrade before the cloak, otherwise you might have a hard time locating the Sentinel again if you forget where you deployed it! Note that you cannot install both this upgrade and a shield at the same time.
|
Scan Angle Limiter
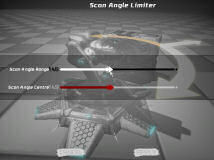
Requires CPU to be installed first. Allows the Sentinel to be instructed to point in a particular direction while idle, instead of the default behaviour of constant 360° rotation. Useful if you know that the enemy will approach from a particular direction and don't want the Sentinel wasting half its time pointing where it will never see anything. To set the angles, you must select the upgrade in the Current Upgrades list in the upgrade menu, then click on the Configure button. The Scan Angle Range option lets you set how many degrees the Sentinel will pan. Set to 360 to have constant rotation in a full circle, which is the default. Set to 0 to have the Sentinel point in one direction only without rotating at all. The Scan Angle Centre option allows you to set which direction the Sentinel should concentrate on. The effect of the settings is shown by the circular arrow around the Sentinel (it will pan back and forth across the arc once the settings are applied).
Note that this only affects how the Sentinel rotates while idle, it can still use the full range of rotation when attacking.
|