10Gb Network Card Cooling
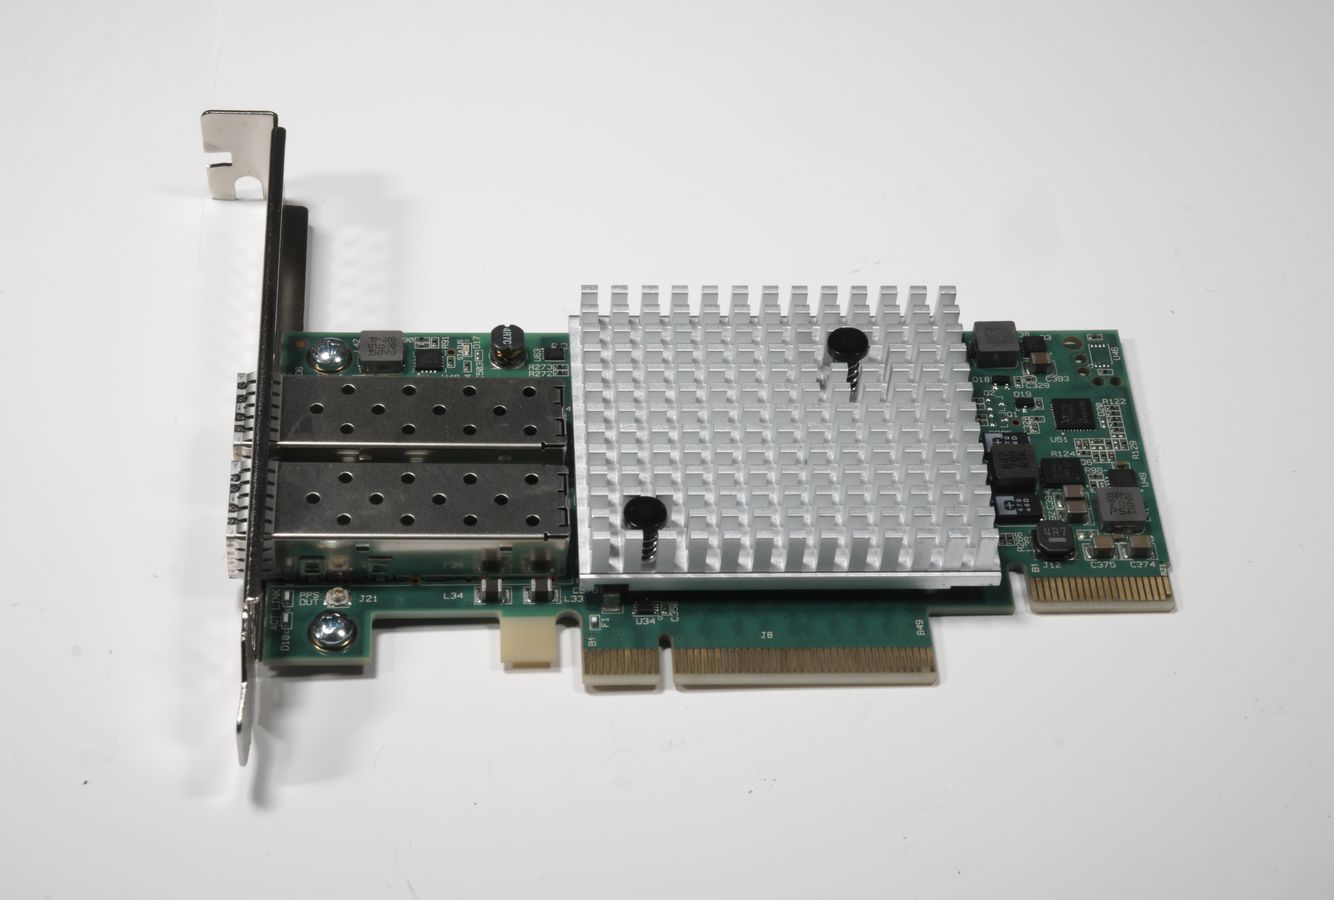
Recently I've been trying to upgrade my LAN to >1Gb/s. The one machine on the LAN that would most benefit is my fileserver, as its SSD is much faster than 1Gb, and it can potentially have multiple people transferring files to/from it at once (including a small amount of bandwidth used to serve this page to you). Like most current PCs it only has a 1Gb ethernet adapter built in, so I had to buy a discrete network card. There are quite a few 10Gb network cards available second-hand, sold off by businesses when they upgrade. I ended up with a Solarflare SFN7022F, which is a slightly older card released in 2013 and no longer made. Older cards use more power compared to new ones, and server cards are designed to be cooled by loud and powerful fans, so I was expecting it to run quite hot in the fanless fileserver. It was hotter than that though...
I installed the card to see how well it would run. I was expecting it to be merely warm, as I only used one of the two SFP+ cages and a small fraction of the maximum bandwidth. However it didn't take long before it stopped working, and the logs showed various errors and warnings, including "the device cooling has failed" and "one of the device voltage monitors has reported an error condition". I touched the heatsink to see how hot it was, and quickly learnt not to do that again. I set up a low-speed case fan nearby to blow air over it, but it still overheated. Clearly something more drastic would be required. Maybe something involving the broken Radeon 280X GPU I had lying around.
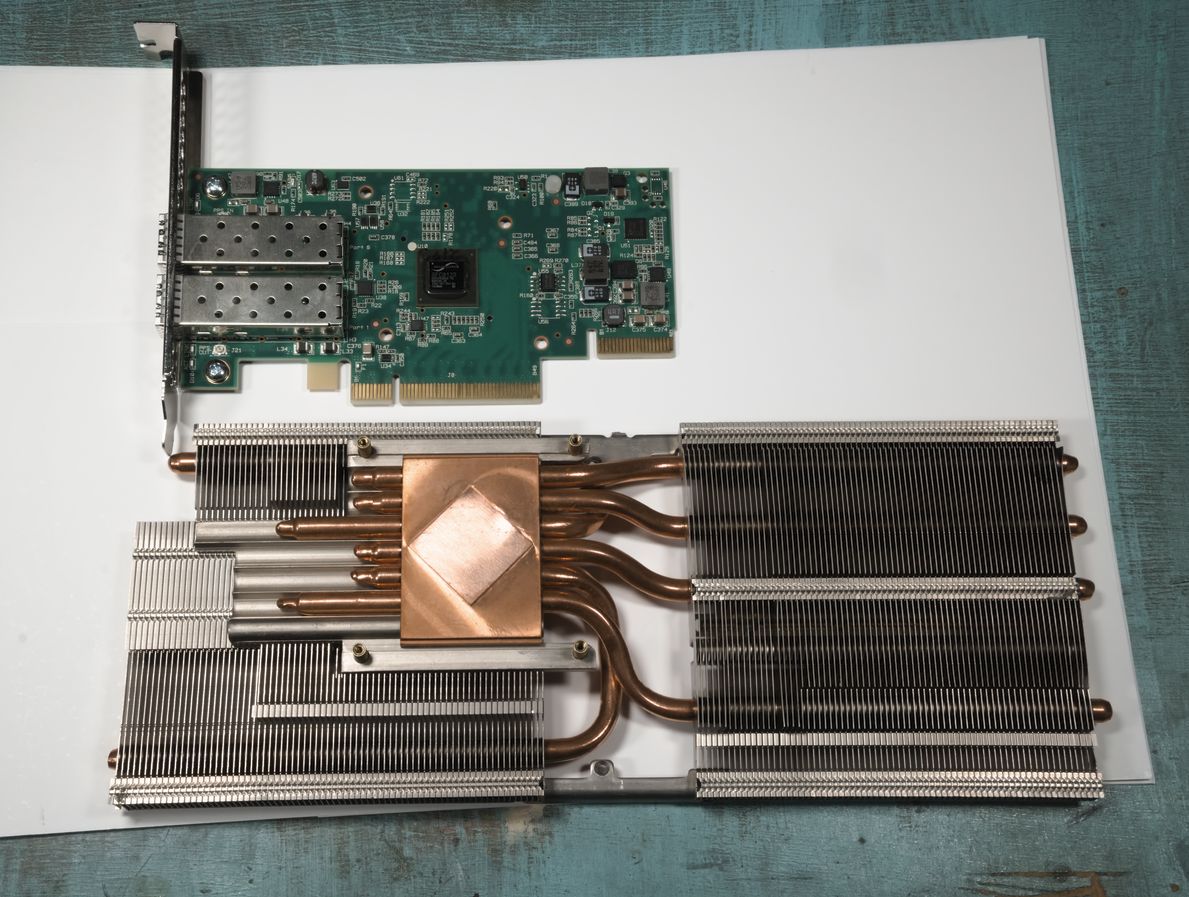
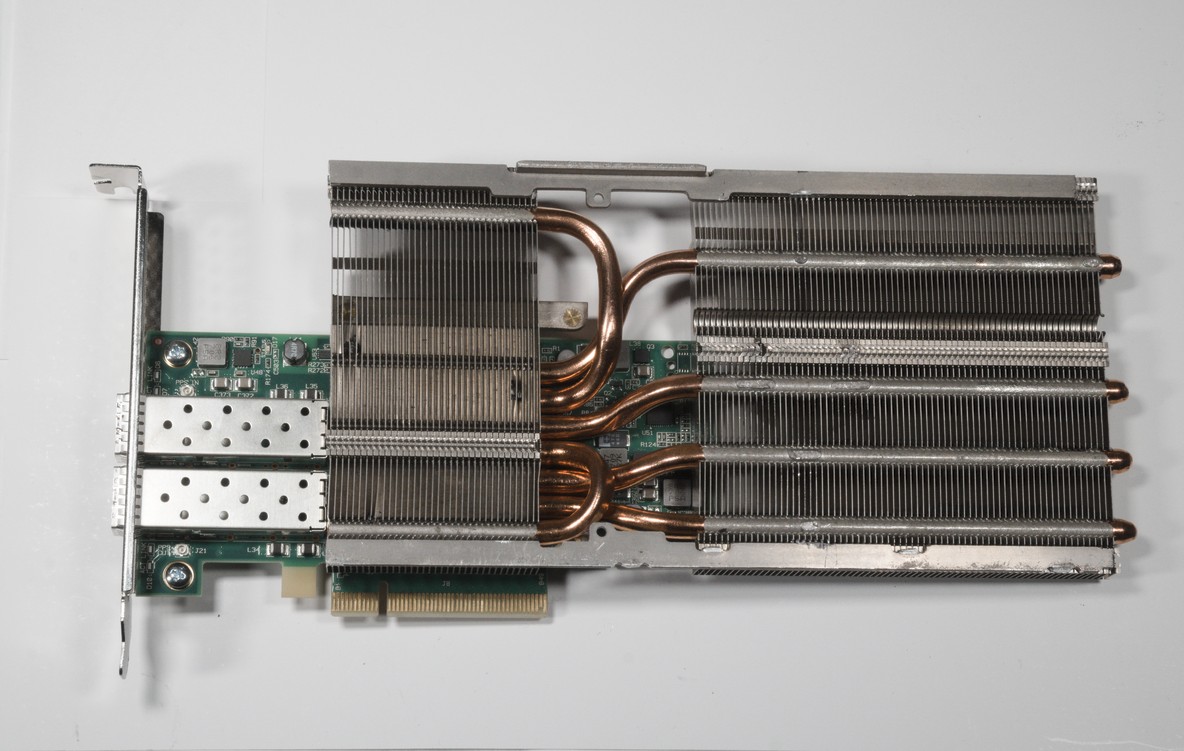
GPU heatsinks have very closely-spaced fins that work well with high-pressure fans blowing through them. They work poorly with natural convection, where the tight spacing prevents air from flowing freely through. Their sheer size provides significant cooling despite that - more than enough for a single network card. Unfortunately it didn't fit. As you can see in the above photograph, the left half of it sticks out beyond the end of the card. That half also sits low enough that it would interfere with the two SFP+ cages. Furthermore, the copper base has a raised section in the middle that doesn't line up with the chip on the network card. Fortunately, everything can be coerced into fitting when you have power tools.
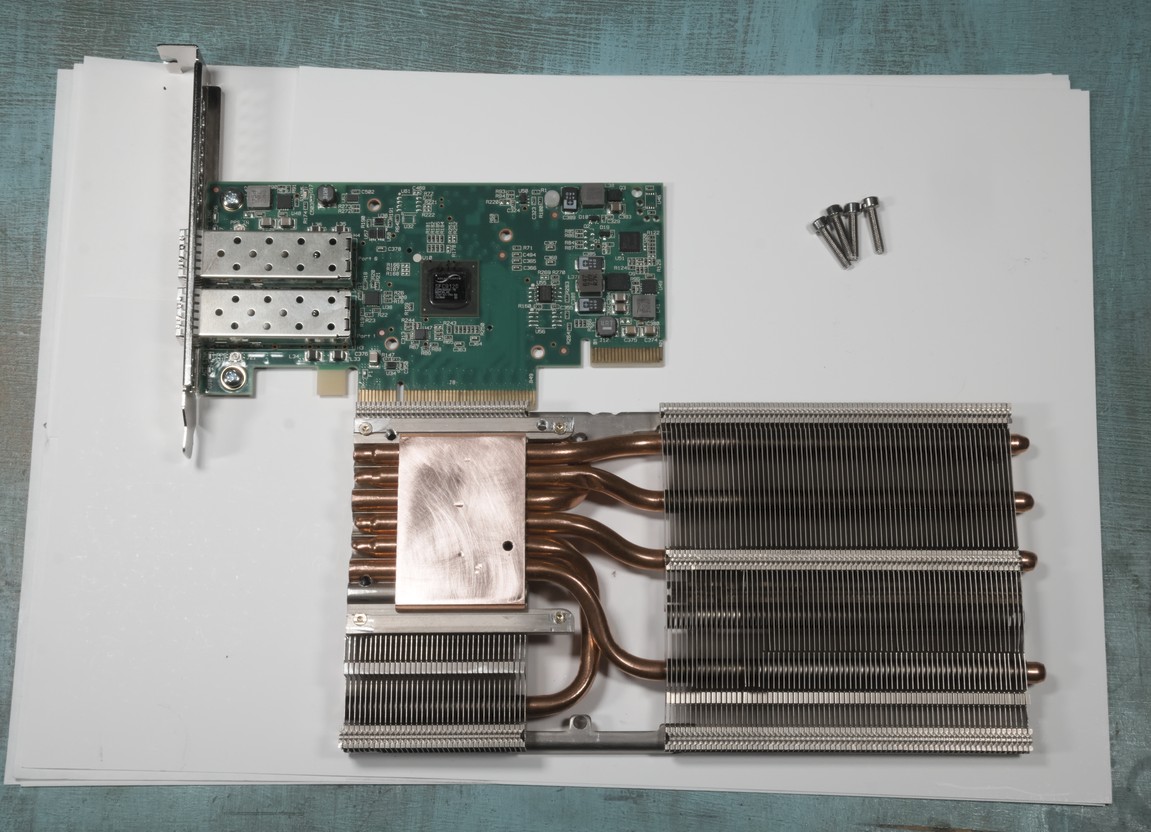
The fins were easily removed using nothing but a hacksaw. I used a rotary tool with a tungsten carbide burr followed by sandpaper to flatten the raised section of the base. I was a bit too exuberant with the burr, leaving a few small dents in the surface. They are all away from where the chip will sit though, so cooling should be unaffected.
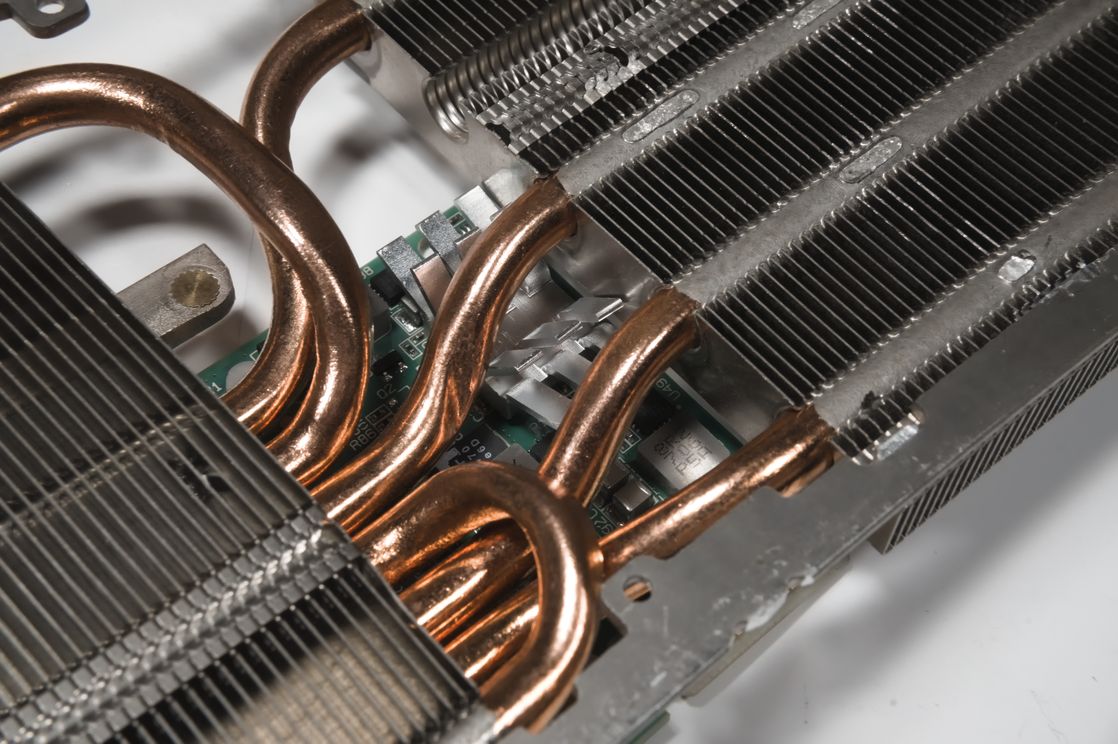
Because heat pipes need to be sealed, the two that I had to cut when shortening the heatsink no longer work, rendering that half of the heatsink much less effective than it should be. There's still plenty of surface area on the other side though, and even without those two heat pipes, some heat will still be conducted to the fins on that side because they are directly attached to the top of the base.
I drilled four holes corresponding to the mounting holes on the PCB. One of the holes had to go through the copper base. The heat pipe under that point was one of the two that were already cut, so there was no further damage caused.

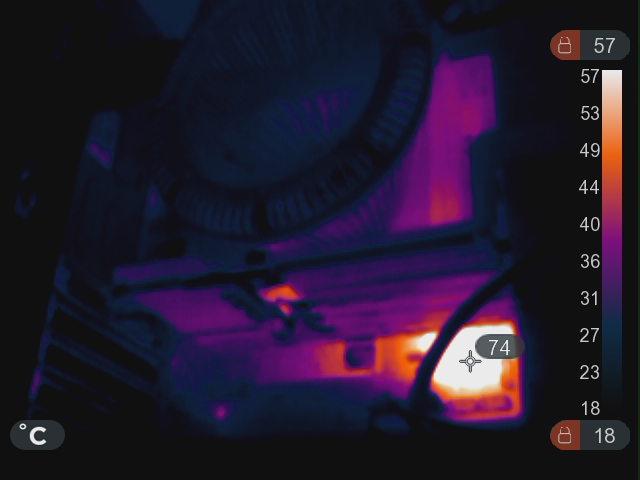
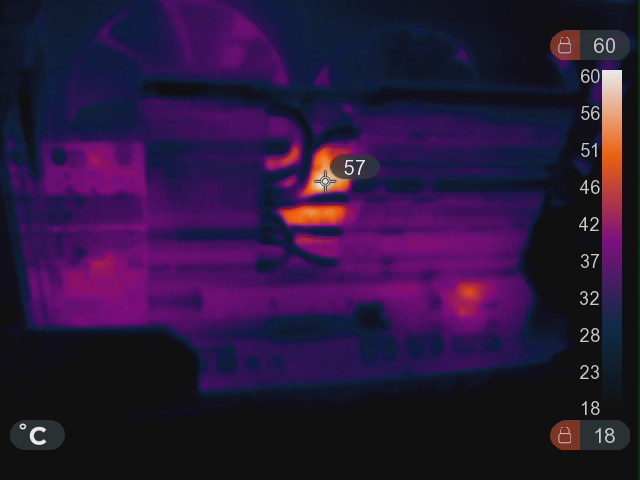
I expected the new heatsink to be more than enough to solve the problem. For testing purposes I installed it in a different PC and stressed it a bit with Iometer sending data over the network for a while. The heatsink was slightly warm to the touch, indicating that it was working as expected, and that I had quickly forgotten the lesson I learnt earlier, but the logs still showed "the device cooling has failed". I ran the Solarflare reporting tool which frustratingly takes 30s to run and is the only way I could find to read the temperature on Windows. It showed 39°C for the controller, which is good. There are a large number of other temperatures reported, most of which are 0 because this particular card lacks those sensors. There are a few that have values though, with one called VoltageRegulatorTemperature being the hottest, at 64°C. Depending on what it actually represents, that might be too hot. Time to put my thermal camera to use.
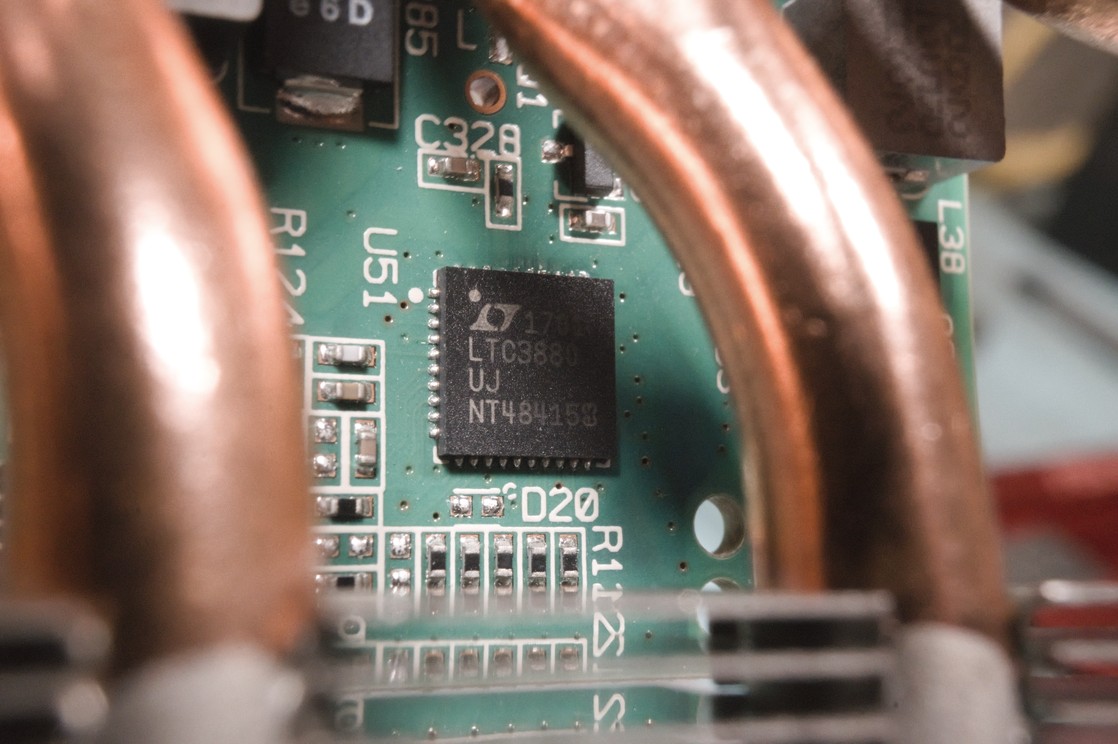
According to the datasheet for the LTC3880, it supports both internal and external temperature sensing, but won't produce an overtemperature warning until 85°C, and only shuts down once the internal temperature reaches 160°C, so it doesn't seem like it should be the culprit. Still it needs verifying, so I stuck a little heatsink on it with some thermal tape.
Later, I noticed that the Solarflare reporting tool was just a VB script, so I could see how it was reading the temperatures - they are made available via WMI, which can be read in some more convenient and faster ways, such as with a tool like WMI Explorer. There are a very large number of values for the card in there, with the temperatures appearing under ROOT\WMI:EFX_Monitor.
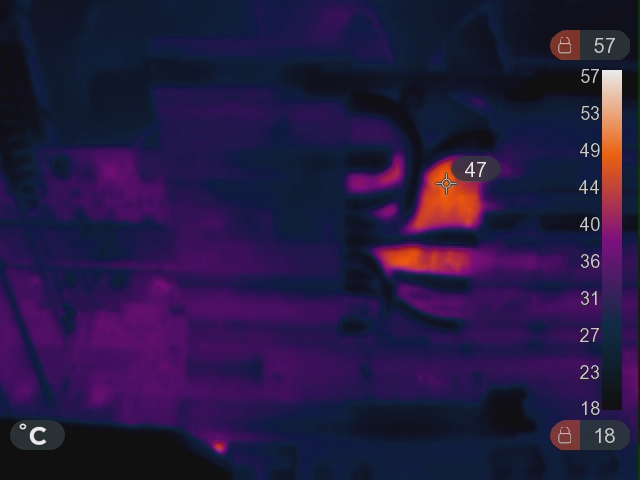
The additional heatsink brought the VoltageRegulatorTemperature down to 55°C, but there were still "the device cooling has failed" warnings. At this point I was suspicious because the warnings were always logged when booting, and not when the network card was heavily loaded. Still, to absolutely rule out something really overheating I plonked a high-speed fan next to the card, bringing all the reported temperatures down to around 30°C. Still the same warnings.
Reading the LTC3880 datasheet some more, it is capable of persistently logging errors in its own internal flash memory. It's possible that the drivers are reading this log on boot and reporting that an overtemperature error has occurred in the past (from when I first ran the card), not that there is currently an overtemperature error. Since the LTC3880 has an I²C interface, it might be possible to connect something like a Raspberry Pi to it and send it a command to clear its log. That would be tricky with the chip in place though, with the card's controller communicating with it at the same time. Since it appears to work fine now it's cooled better, I'll leave it alone for now.
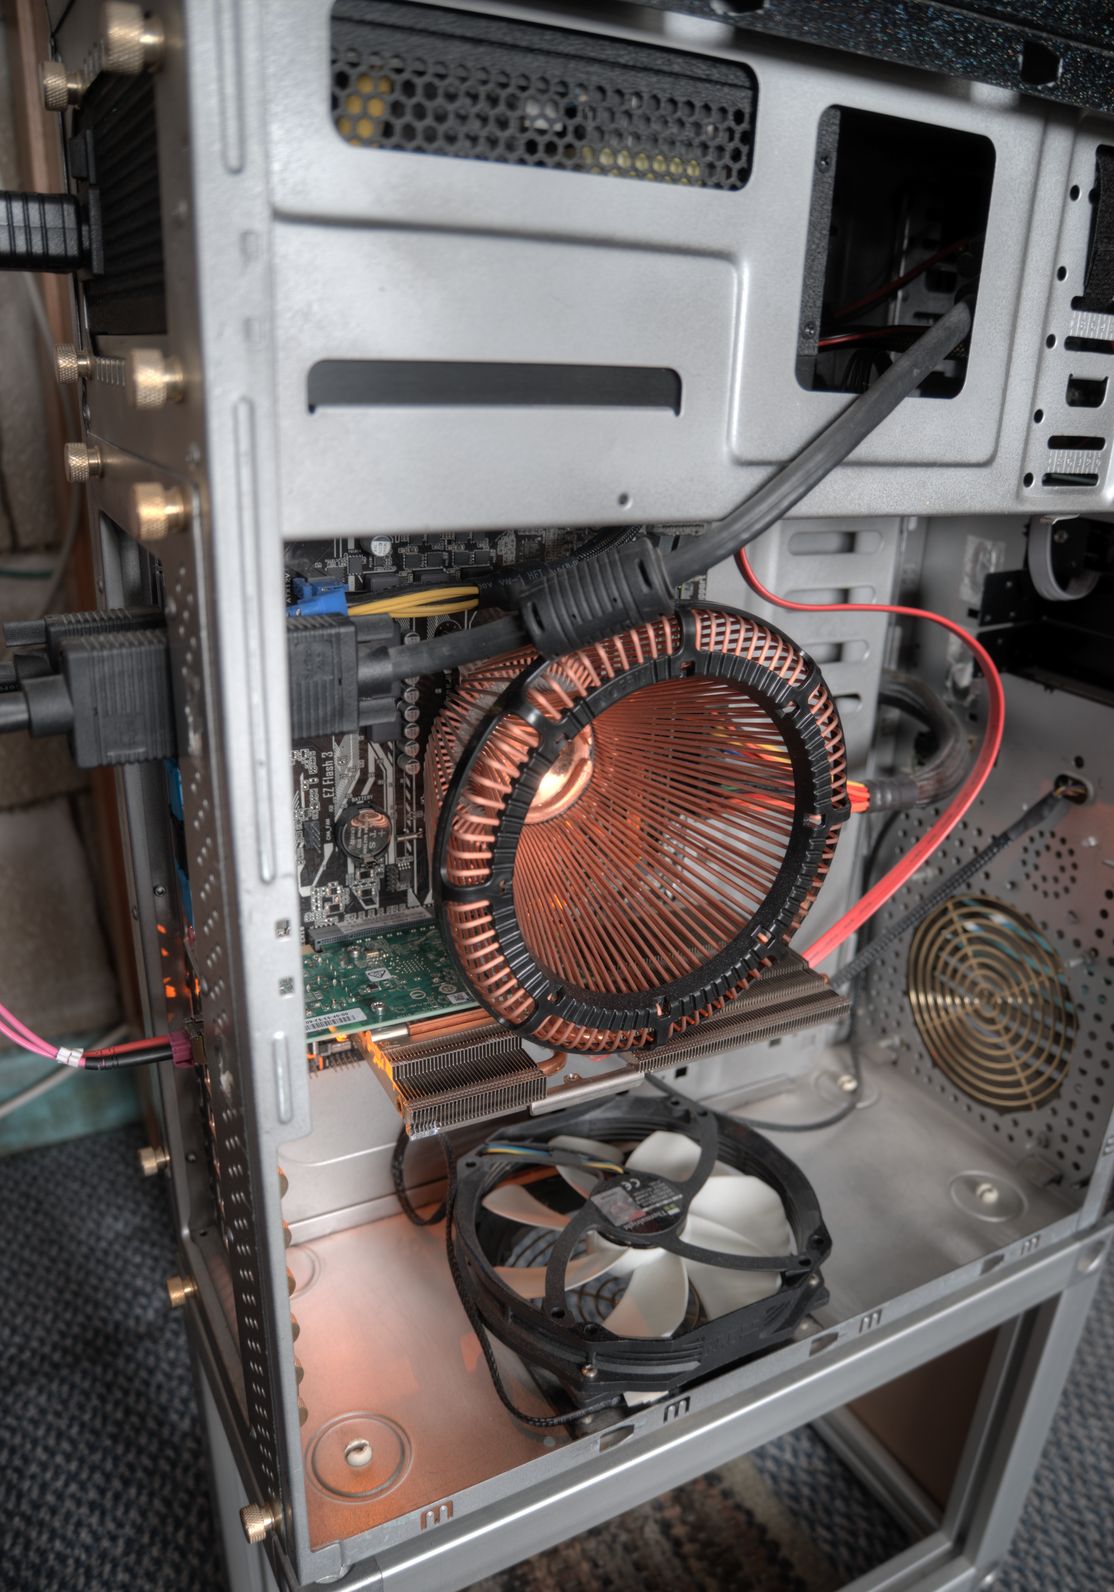
The large circular copper heatsink on the CPU in the photo above is a Nofan CR-80EH. Note how large it has to be to achieve its modest rating of 80W fanless.